ok you asked for it, the non jeep build thread.

This site may earn a commission from merchant affiliate links, including eBay, Amazon, and others.
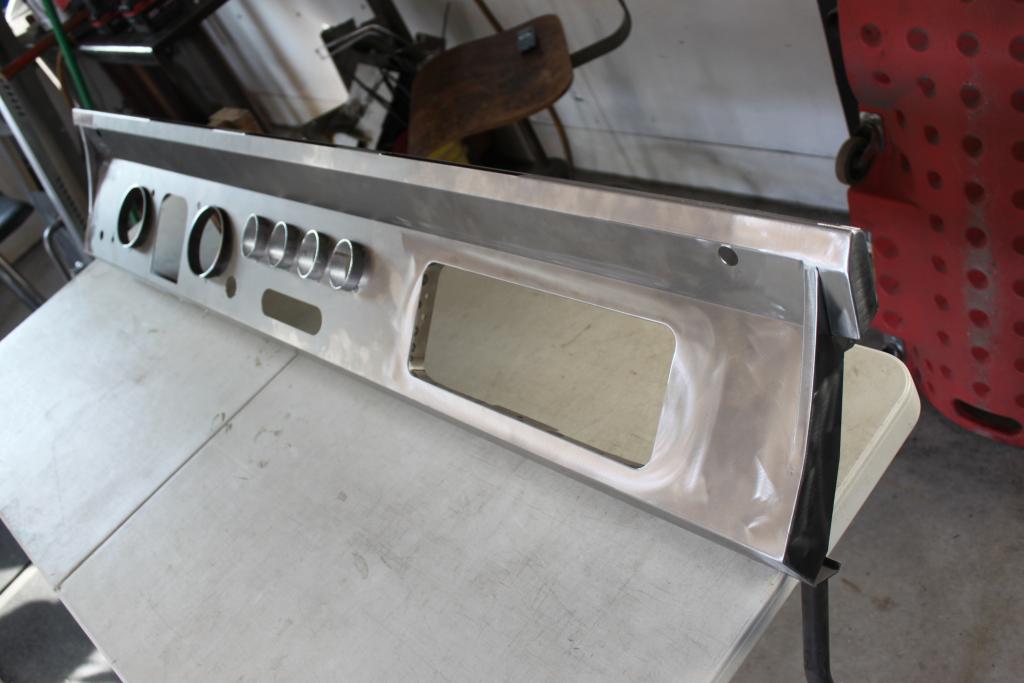
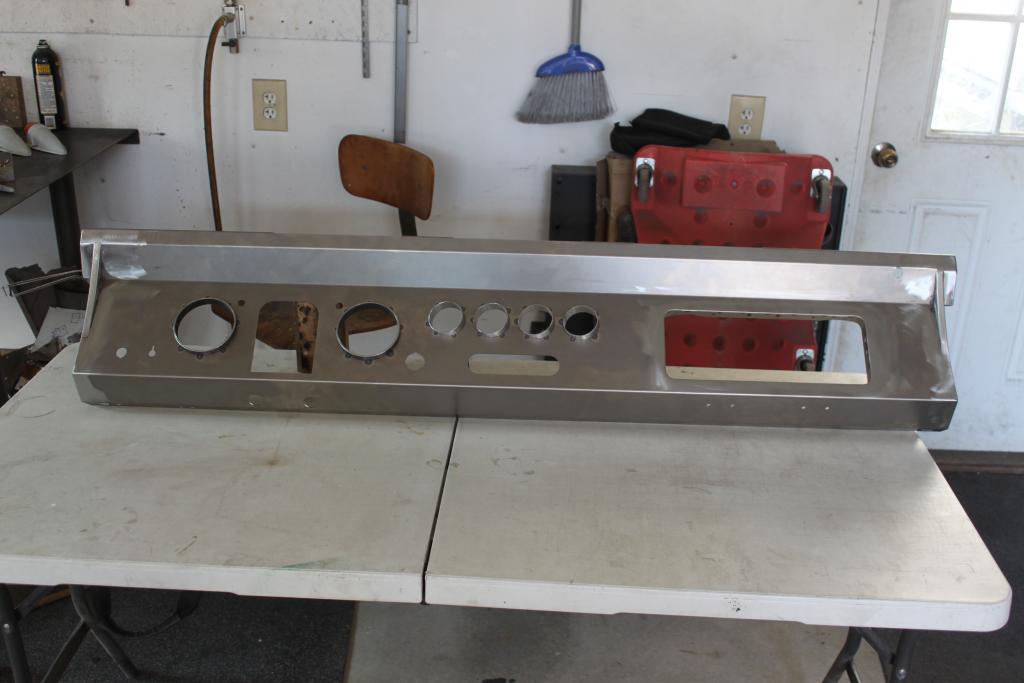
another thing I have never liked about these early broncos is the dash and instrument cluster. it looks like it belongs in a tractor not a car or truck. so from the beginning I had planned to redo the dash. I saw a guys build on the classic bronco forum and he had used a blank dash from BC broncos to make a complete custom dash. I really liked his version so I ordered a blank dash. but they were on back order because they lost there supplier. I waited 6 months and finally decided they weren't going to be getting them in any time soon so I decided to go a different route. I did like I do most things multiple angles at once and hope one of them worked out. I ordered a blank dash from wild horses and started planning out my options. one thing about these broncos is that the glove box door is one of the main places the vin tag is attached so it was pretty important to preserve that. but if you want to run a front roll bar extension ( I don't know if I do or not) you have to move it over or you can't open the door. so since I had to cut the opening out in order to move it to the overlay anyway I moved it over 4 inches while I was at it.

IMG_4492.jpg 20190317_220541946_iOS.jpg

before I actually started working on this however i sent an email to a guy I knew of on my yj page on facebook. he builds custom jeep dashes. I asked if he would consider branching out and doing early bronco dashes. he didn't respond right away so I started working with my dash. but then a few days later he contacted me and said that he had a friend with an early bronco and they were considering doing it for him so he wanted me to take some measurements. so I took a bunch of measurements, and ended up just sending all the stuff I had to him to use as a template. we will get back to that later.
 
after I sent the dash stuff off I finished up the stuff I needed to do on the chassis. namely running the fuel lines. I realize I need to do some alterations on it later, and I need to make a pigtail for the fuel pump and sending unit wires. but at this point it was ready to test fit the new body to see if it would fit this frame and engine. stay tuned for the next exciting episode of building project Tetanus

IMG_4638(1).jpg
 
so after I finished the fuel lines and the exhaust I decided it was time to test fit the body. I learned a few important things when I put the body on that I will keep in mind for when I put it back on permanently. but this is just a test fit and for the body mounts, and for cutting the fenders and trimming for the shifter and all those little things that need doing before I am ready to paint the body. I got my Dad out of the nursing home again to come over and help line everything up, and I managed to drag my wife out to give me a hand again also. and the shop dogs of course had to get in the shot and take all the glory naturally.

IMG_4648.jpg IMG_4652.jpg IMG_4654.jpg IMG_4655.jpg IMG_4659.jpg IMG_4663.jpg
 
after that i had a friend come over and help me get the hood on and cut the scoop for it, I am not entirely sure about that scoop yet. I will have to see what the body shop can do to make it fit better. I like the look, but it needs some tweaking to fit the contour of the hood a bit more, and to be honest I have never really liked a bolt on hood scoop that much. I also had to cut a lot of the cross bracing out of it to fit the scoop, so I will have the body shop add some reinforcement to it, and see if they can make the scoop look like I want it to. the alternative is to get a fiberglass hood, with the scoop molded in, but I just don't really like the styling of any of the fiberglass hoods I can find. so for now I am sticking with this one
IMG_4901.jpg


after I did that I cut out the fenders for the flares. I still need to cut the inner fenders a bit but I really prefer the look of the flares on these trucks.
IMG_4921.jpg
IMG_4924.jpg

then I cut out the holes for the marker lights but for some reason that picture doesn't want to load.
 
so after this I spent a lot of time figuring out how to setup the throttle linkage so it wouldn't bind and so I would have full throttle motion, and I test fit the pedals and the vents and the emergency brake pedal. as well as the heater/ac plenum.


20190624_030136195_iOS.jpg
 
in the mean time Dan Dilner from Double D fab had been working hard on getting my dash made. it took a while to get it exactly how I wanted it, and I of course had to order some custom speedhut gauges. I am really happy with the way it turned out.
this is the pdf file he sent after we had finalized the plan.
IMG_4557.PNG
then he fabricated it and sent me some pics

lp5K4sF.jpg


xgVgp47.jpg


once I got it here I put my gauges in and mocked everything up. I'll admit first time it didn't go perfect. I did have to send it back for some minor adjustment. but when I got it back it looks and fits fantastic.

IMG_4928.jpg

IMG_4944.jpg

IMG_4932.jpg

IMG_4552.jpg
 
and that is basically where I am at right now. that is about 10 months of work shoved into a few posts, I have a ton more pictures if there is anything anyone wants more detail on, but I tried to hit the high spots. but I will try to update this thread as I make progress
 
Hey guess what? I submitted the Bronco to Gearz tv. I have always loved stacey David, and project crazy horse was one of the reasons I always wanted a bronco. (the paint was not my Forte, but I loved the truck.) anyway I just found out it is going to be on Gearz this saturday !!
 
it is going to be re shown several times.

it was not one of his better shows. i love stacey David, i think he is an amazingly talented guy, but i guess you have got to pay the bills. a lot of his shows lately are turning into a collection of commercials. but he still has cool projects and I was still honored to be selected. and i got some cool swag. I was supposed to get a slot car kit that i was not all that excited about. they used to give out really cool tools , but I was just happy to be selected. but for some reason they either sent me the wrong thing or changed their minds because they sent me this awesome woodward fab bead roller instead. I still have to put it all together and figure out how to use it, but it is way cool. anyway it was a fun experience.
 
I think the bead roller will be a lot more useful than the slot cars.... But that's just me. And once again, congrats on being selected and thanks for sharing your build thread!
 
My Dad is back in the hospital again. congestive heart failure. he is not looking to good right now. hopefully tomorrow will be a better day. I stayed with him for a while but he can't really talk right now with the bipap mask on and he is really sleepy so I decided to come home and do some work on the bronco. I finished mocking up the amp research retractable steps. I am getting old dangit, and it is not as easy to climb into these tall rigs as it used to be. and I was never all that agile anyway so this will make the truck easier to enjoy for many years to come. I used a custom mounting bracket made by Northeast classic ford parts. it made the install easy, and it will greatly increase the strength of the step later. if you don't get something like this, you are supposed to basically just screw it to the rocker panel sheet metal which I don't think would hold up over time. I will try to upload a video, if it doesn't work I will link to the utube file.


IMG_5015.jpg
IMG_4977.jpg
IMG_4978.jpg
IMG_4979.jpg
 
Last edited:
Sorry to here about your dad, I just lost mine last Christmas.

Thos steps are handier than a shirt pocket.

I wish you were my neighbor.
 
2

Latest posts

Back
Top