
You are using an out of date browser. It may not display this or other websites correctly.
You should upgrade or use an alternative browser.
You should upgrade or use an alternative browser.
My trailer build thread.
- Thread starter mustanggarage
- Start date
This site may earn a commission from merchant affiliate
links, including eBay, Amazon, and others.
mustanggarage
Well-Known Member
Floor epoxy done. But I think I need a second coat. The wood just sucked it up like crazy and it looks a little light in areas. My wife helped me a lot but she asked me not to take pictures of her so I suppose I shouldn’t post any of the in progress pics I took
Attachments


Very nice. Can't see, but did you float the gray, tan and black chips in it?
N/M, on a close up, I see you did.
mustanggarage
Well-Known Member
the floor really seemed to soak up the first coat of epoxy. when it dried it left some areas that weren't covered well enough to suit me.
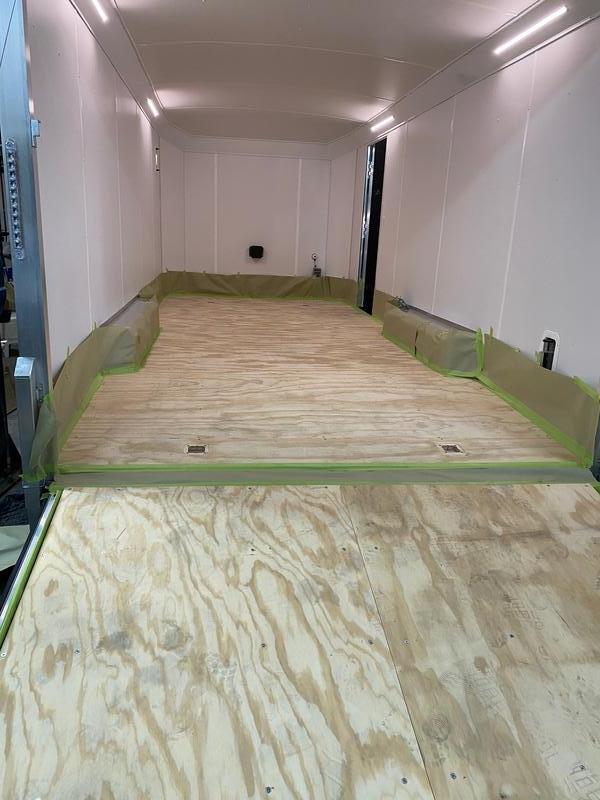
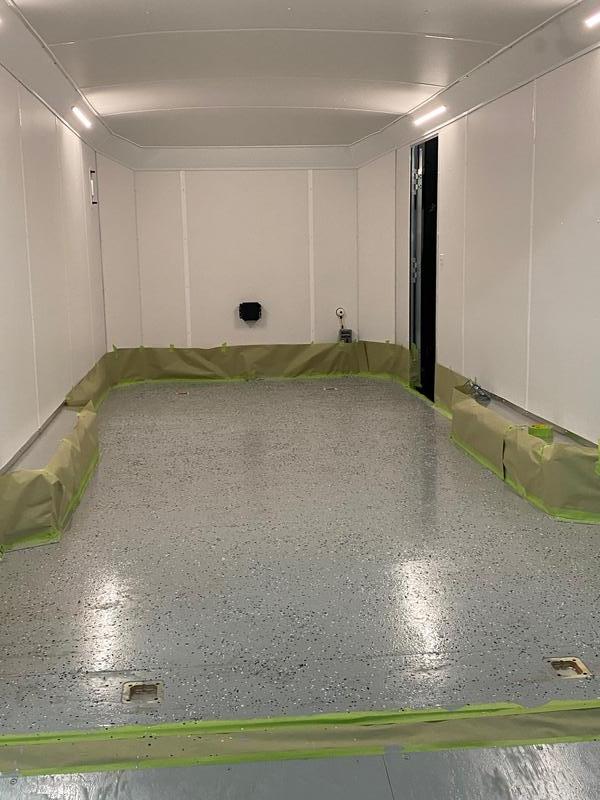
so I put a second coat on, and then a clear coat on top of that.
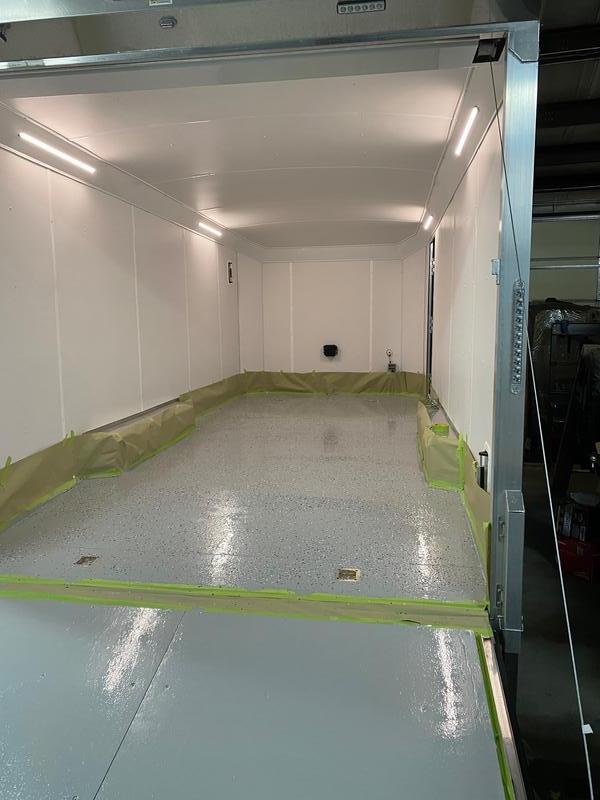
it seems pretty tough. it is not slick. I put a quite a bit of anti skid in as I went along also. I like the way it looks. it looks clean, and it will resist anything I happen to spill on it.
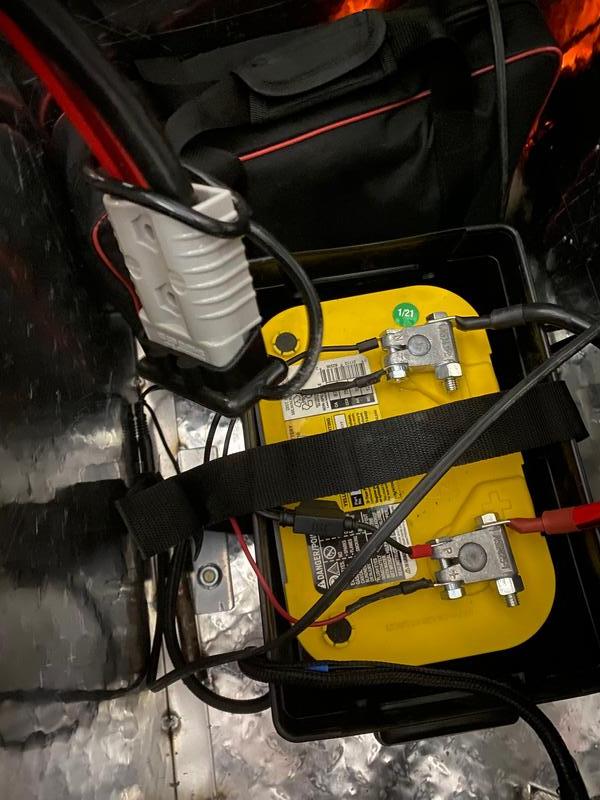
then I anchored my winch. it is a warn 8,000 pound winch, way overkill for this job, but since it is such a powerful winch I wanted it anchored firmly. so I mounted it to a yj winch plate, then I mounted the winch plate to the floor. the back two bolts go all the way through the frame square tubing, with a big washer on it. the front two just go through the floor, but I put a roll bar backing plate under each of them, so they are at least as strong as the D ring mounts. that winch is not going anywhere. then I ran the wiring through the floor. I ordered some special locking grommets to go through the box to the battery, but they aren't here yet so I haven't tested the winch yet.
I also got my quick disconnect jumper cables and mounted the permanent end to the battery. the jumper cable part came in a nice carrying bag that I will store in the battery box. it is 30 feet long so it will easily reach my truck battery if the winch battery should ever happen to be dead.
then I started framing in my work bench/ storage area.
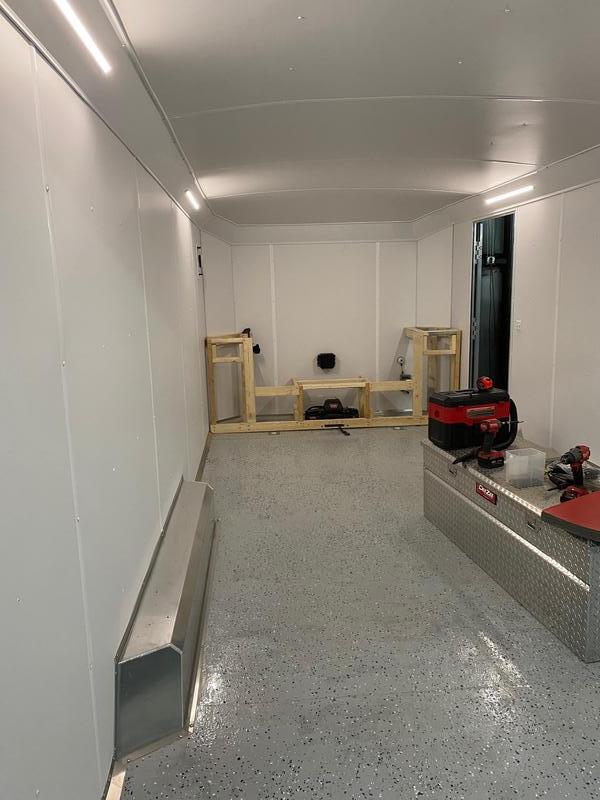
the front is on and the doors are in place. I haven't screwed the side doors in yet. I still have to decide how I want to do the plug ins. but I did wire up a test plug and used it to cut the hole for the winch fairlead. the top is just sitting on there right now. I have to decide how I want to finish it, and I need to get some trim to finish things up a bit, but its coming along. its just a good thing I am a better doctor than I am carpenter lol.
so I put a second coat on, and then a clear coat on top of that.
it seems pretty tough. it is not slick. I put a quite a bit of anti skid in as I went along also. I like the way it looks. it looks clean, and it will resist anything I happen to spill on it.
then I anchored my winch. it is a warn 8,000 pound winch, way overkill for this job, but since it is such a powerful winch I wanted it anchored firmly. so I mounted it to a yj winch plate, then I mounted the winch plate to the floor. the back two bolts go all the way through the frame square tubing, with a big washer on it. the front two just go through the floor, but I put a roll bar backing plate under each of them, so they are at least as strong as the D ring mounts. that winch is not going anywhere. then I ran the wiring through the floor. I ordered some special locking grommets to go through the box to the battery, but they aren't here yet so I haven't tested the winch yet.
I also got my quick disconnect jumper cables and mounted the permanent end to the battery. the jumper cable part came in a nice carrying bag that I will store in the battery box. it is 30 feet long so it will easily reach my truck battery if the winch battery should ever happen to be dead.
then I started framing in my work bench/ storage area.
the front is on and the doors are in place. I haven't screwed the side doors in yet. I still have to decide how I want to do the plug ins. but I did wire up a test plug and used it to cut the hole for the winch fairlead. the top is just sitting on there right now. I have to decide how I want to finish it, and I need to get some trim to finish things up a bit, but its coming along. its just a good thing I am a better doctor than I am carpenter lol.
Very clean!
Looks great, nice work.
mustanggarage
Well-Known Member

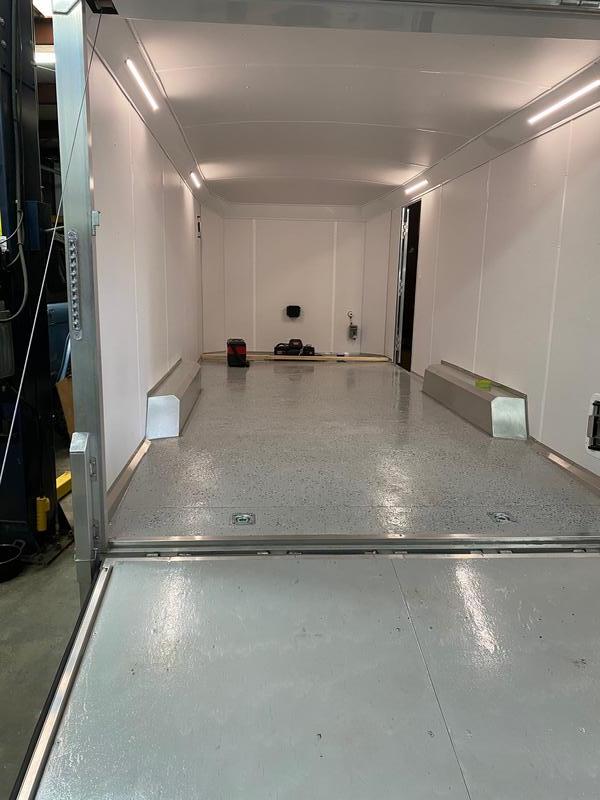
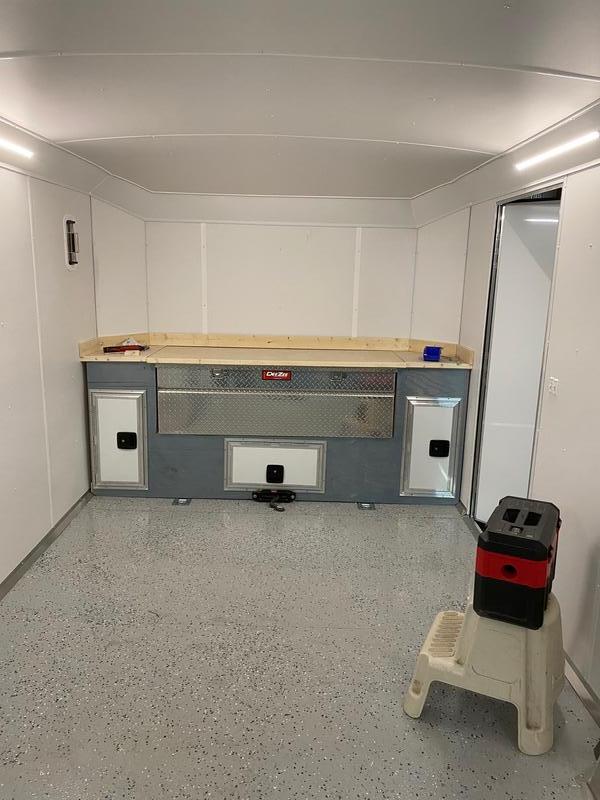
I basically finished the inside today. I have the winch wired and tested. the tool box mounted, the workbench completed. I painted it the same hammered black that I used to paint the roll bar on the bronco so I won't have to store more colors of paint. I loaded my new tool box and lots of other stuff up, I still need to get my other camp chair, and my detailing kit decided on, but basically inside is now done, now I need to get it over to the tire shop to get the new wheels on. I still have 2 more pieces of etrack but I am going to use the trailer for a bit before I decide where I want them. and I need to get the bronco in there in order to see where I want to mount the spare tire. but things are moving along.
On another forum I purview, here is how they finished the insides. Not discounting your great job, just another vision from someone else. I do like their rubber mat idea.

mustanggarage
Well-Known Member
That looks amazing. I would have liked to have the trailer set up exactly how I wanted it from the factory. But I didn’t have the 8-10 weeks a new trailer would have taken.On another forum I purview, here is how they finished the insides. Not discounting your great job, just another vision from someone else. I do like their rubber mat idea.
View attachment 5948
Here is one that seems suitable for a mobile vet?

Here is another that was professionally Rhino Lined.

mustanggarage
Well-Known Member
I considered raptor liner. I actually have 4 quarts leftover from the bronco but I decided I liked the epoxy better. Lots of great ideas.
mustanggarage
Well-Known Member
I think I am basically done with the trailer for now. I still have more e track but I’m going to use it for awhile to decide where it will be most useful. The new wheels look great and I’m happy with the inside
Attachments


Looks great!
oldognewtrick
In memory of
Awesome as always, love it!
Fantastic. How did you mount the spare up there?
oldognewtrick
In memory of
Uh...on two bolts?Fantastic. How did you mount the spare up there?
Spare tires are heavy. I thought it would have ripped the bracket right off the wall?
oldognewtrick
In memory of
I don't think I'd want that hanging over my pristine Bronco, but what do I know...Spare tires are heavy. I thought it would have ripped the bracket right off the wall?
2